Showing posts with label Radish. Show all posts

Tuesday, January 12, 2016

Update: 1/12/16


Coming up into my second season with this system.  It has been amazing how well it has done so far.  I wish I had a greenhouse but here in Phoenix I managed to get through most of the grueling summer and only had to cover my system a few days this past winter.

While replanting at the end of summer I noticed that the Coco Coir does break down some.  I added about a 5 gallon buckets worth of Perlite back into the grow barrels.  And in the last new grow barrel, now up to number four, I didn't use any Coco Coir in it at all.  In stead I used a mix of Large Perlite and Clay balls.

Here are some pictures from this morning.  This should be coming out of our colder winter days and getting into our real growing season.  A few of the plants are looking a bit stressed but over all I think I have a good head start.  :-)


Monday, March 9, 2015

Get your feet wet!

Start a Aquaponic Garden.

Aquaponics is fast becoming the new way to garden (even if it is as old as the pyramids)
By growing veggies and fish in the same closed system you feed the fish and the fish feed your plants.  You get much faster growth from the plants because everything the plants need to thrive is always at optimal levels and available to the plants.

My single barrel system consists of using two haves of a 50 gallon Food grade barrel, making a 25 gallon fish tank and a grow bed that has 12 square feet of growing area.  With a pump to circulate the water and the built in worm farm, it is a high quality system to get into Aquaponics that is easy to setup and start gardening.

By adding a worm farm to the system we've introduced the means to add the micro-nutrients that hydroponic systems either neglect and everyone wonders why the tomatoes are tasteless. Or pay big money for chemicals to add in extra nutrients to get some of the taste back into their produce.  Just feed the worms with plant scraps from your kitchen that already contain the nutrients in a plant usable form.  No more wondering what type of chelated iron should be used for what PH level.

Order a single barrel system for $300 today and get your Auqaponic Garden Started.  Then add more grow area.  The grow containers are very modular and can be easily combined into a bigger system, or added to an existing system of a different type.
Day one, Other side.
Day one, Setup and transplanted


From day one you can start seeds or add transplants to the growbed.


You can order this system Here
Single Barrel Aquaponic System

Get Your Feet Wet!


Day 1


Day 9


Day 13


Day 20


Day 25


Day 28


Monday, August 25, 2014

Week Four and more.


While out and about this week, while coming home after my wife's doctor appointment, I found a hydroponics shop in Mesa.  I had not been to one as of yet but was interested in what I could find there.  So much interesting stuff to look at.  I ended up buying some 3.75 inch net pots.  That was my excuse for wanting to go there in the first place after all.  I also decided to get a timer and some of the Hydroton expanded clay pellets.  I was originally going to just stay with the lava rocks I had gotten at Lowes  but the Hydroton was so much lighter, maybe a third of the weight of the lava rocks, I thought it would be a good trade.
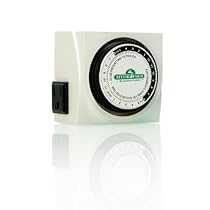
Now I finally have my my system on a Timer too.  I just got a cheap mechanical timer that had 15 minute durations.  I have been finding a lot of different suggestions for how long to run and rest hydroponic systems.  I decided to do a 45 minute cycle.  15 minutes on and 30 minutes off (rinse and repeat for the rest of the day). I think that left me with one cycle though that has a 45 minute rest (odd ball). It has been running like that for several days now and seems to be a good match for this system.  The Hydroton stays moist yet gives the roots a chance to breathe.


The next thing I found this past week, thanks to a suggestion of a friend of mine was a beautiful basil plant at the Fresh & Easy market.  They were actually selling it as a rooted herb that you could grow in the window sill.  Wonderful.   I still have a couple of basils I had started from seed but this gives me a great head start.  And it is fun having more real plants to look at in the window garden.  :-) 


With the acquisition of the net pots I was able to finish the second unit and start to populate it with some plants.

Drilling the holes for the net pots was a fun thought process.  I was originally thinking to get a hole saw but I would needed an armature and the right size hole saw for around $40 at Lowe's.  That ended up being a bit expensive for just the four holes I wanted for now.  After rooting around the garage for a bit I found a metal cylinder that fit the opening for the net pots.  I just heated the metal with a propane torch then pushed it though the plastic lid.  I was able to get nice clean holes and it was actually pretty easy going.  Just be sure to wear your safety glasses and gloves and be careful.  I may even try doing this method with the bowls so I don't crack the bottom of the bowl, if I can find the right size pipe any way.
Of the two cucumbers I transplanted into net pots,
one seems to be doing great and one not so much.

Seed domes on top of storage container in window.
I moved my seed starting domes into the window in the spare bedroom instead of being in a dark corner in my office.  And started some Poblano Peppers and some Early Wonder Beets.  Hopefully I will get better germination rates now, maybe.  But since most of the seed packs I have around are several years old I decided to start the seeds with the paper towel method.  This way I can put out several seeds and carefully move the ones that actually germinate into a starter pellet to let it get a good start.

Paper towel method for starting seeds
Another thing I picked up this weekend is a package of  PH testing strips.  I had wanted to find some drops after talking with the guy in the hydroponics store.  In fact I should have just bought them there but I thought I could find them elsewhere I guess.  I looked at both Home Depot and Lowe's but none of the test kits they had went down far enough for plants.  They were made for testing pools.  I next went to Leslie Pools and even their test kits only went down as far as 6.8 but he did have some test strips that went to 6.2 I figured that would be good enough for now anyway.  And they were cheaper there than either of the box stores.  When I tested the water I had running in my buckets I found it was at 7.8. Hmmm, that is a bit high.  Another cheap suggestion I have heard for adjusting PH levels down is to use white vinegar.  I added a tablespoon to each bucket and that brought the PH down to 6.2.  That seems to be a decent starting point for a mixed system of plants so I will see how that works over the next few weeks and maybe add a bit more vinegar if I think it could help.  But I wish the PH strips went down as far as 5.5.  Hey these Testing Strips look like they might be much better, they go down to 4.5.  and the price is about half of what I paid for the ones I got and they were already cheaper than either of the box hardware stores were.

I guess next I want to start looking at some sort of grow light system.  I was thinking I would find some pendent lights at a yard sale and put some LED grow lights in them.  But I may look into the LED strips too.  They would be easy to work with, I could easily attach them to my trilis and it looks like they are only 12 volts so there would be a little less worry about having them around the water.  Anyone have any other suggestions?

Have any suggestions, comments or questions.  Leave them in the comment section below.


Popular Posts